Thursday, May 29, 2008
Dome Motor Working
In this video you can see the small motor turning the dome without
any problems.
Now I only have the motor taped into place and you can see me walking
around R2 to help hold the motor in place. I ran the mess out of the
little motor, spun it around - jerked it back and fourth to see if
I could damage the motor somehow. But it took the stress and didn't even
start to get hot. You can hear a small whine as the motor reaches full speed.
Now I don't know if the Pittman motor makes any noise at all, So I can't
compare the 2 motors. Also you will hear it slipping on the dome bearing,
But mounted correctly that will not be a problem.
In all, I think the motor will be a good choice as a dome motor.
It may not work in all cases as the domes can get pretty heavy,
But all I'm missing in my dome is the Periscope and some other
small items and it works fine.
Wednesday, May 28, 2008
Dome Motor


Here's the type of motor I plan to use for my dome drive.
You can get them here: Super Droids
Now these may not be as fast as the other motors, But I just got mine in the mail and they are quite and strong. The only thing I did notice is a small amount of slop in the gear when it starts up, But I'm hitting it with full 12v. so it just takes off.
I did'nt want the motor hanging down in the chest area of R2 and my A&A frame
has a perfect spot to mount the motor.
Just need to make a mounting bracket and I'm good to go.
This maybe the motor I use for the Periscope lifter.
I don't know if I will need this speed or a slower one.
Monday, May 26, 2008
Remote Thoughts
Back when I started my R2, I had planned to use Phidgets
The reason I changed to Vex was due to price and not needing an on board computer.
But, Since Intel now has a Micro ITX board with a reasonable price I'm going back to my 1st plan.
Using this board will allow me to have Video, Sound, and use a Logitech Wireless Gamepad instead of the Vex remote. The gamepad has more buttons and the software will allow me to combine buttons for more features.
The code learning will take me awhile to get it figured out, But the forum for Phidgets has allot of helpful information.
The Vex Micro in my dome will remain as it helps control the servos in this area
and can be controlled by the Ebay 12ch remote.
I'm back to researching options for this setup, But so far I'm not even scratching the surface of what can be done with a computer on board.
Sunday, May 25, 2008
Dome Buttons

I had Brenda paint my dome buttons today. I know they're suppose to be all blue,
But these buttons have a blue light around the edge of the center and I like them this way. There's also 1 button on the top of the dome and it's painted the same way.
Still not sure what I'll use thes for, But they're there if I need them.
Sunday, May 11, 2008
Weathering Comparison


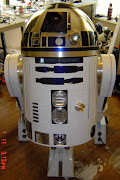
Here's a comparison of a weathered R2 and my R2. As you can see in the pics the detail panels show up much better than mine shows. I'm thinking more and more about this and I really like the dirty look. And with mine in the sunlight, You can't see the details at all.
General Update Video
This video is just to show how my R2 is slowly coming together. I still have along way to go. But if I can get the skirt, feet and a few details finished then I can finally start wiring. And yes this is my Junk room. I know it looks terrible, But working on R2 you can make a mess easily.
A&A Leg Mount Upgrade


I didn't like the A&A mount for the legs.
It seemed weak and it was made for the 2-3-2
motion. So I took some aluminum plate and added some angle to the top where it bolts to the top frame ring.
This will give me a strong mount and also I have the holes set for 3 legs.
I've tested it on the other leg and it's much easier to mount the legs and it feels allot stronger.
Since I made my legs from wood, I had to adjust each leg for the correct tilt of the body.
Friday, May 09, 2008
More Door Work

These are the magnets I plan to use on the rear door.
They fit the aluminum channel, 1 will be on the inside of the channel and the other will be recessed into the door frame.
You can see in the pic how the aluminum channel adds a nice frame for the door opening. If I would have had 2 long channels I would have run it from top to bottom, But I only had some scraps and had to splice the bottom.
And the other pic shows the inside how the door and the channel comes together. This aligns the door every time it's put on the droid.


Thursday, May 08, 2008
Rear Door

I started on the DREADED door!!!
I really don't like this door, But you have to have it to gain access to the electronics in R2.
The A&A frame comes with the door hinged by a threaded rod, But it doesn't work that good.
So I started framing the skins to allow the door to slide into place and I'll add magnets to the door frame and the new skin frame to hold it in place.
As you can see I ran out of aluminum near the bottom of the skin.
 I'll have to buy some more and finish this later.
More Painting


Everything turned out pretty good except for the Horseshoe. It's not bad, But right around the edges of the silver area there is some rough showing.
I'll touch it up as soon as it dries.
Once all these parts dry, I'll put them back together and get R2 back on his feet.
Weathering
I'm not ready to make a decision, But I'm thinking more about weathering my R2.
It's not because I did a crappy job on the painting or on the assembly, It's just because
I had the skins out in the sunlight and even though the paint is a Satin finish it's just too bright.
You can't see the details on the skins and it kinda blinds you from the light.
If I do the weathering, It will be lightly done not a heavy coat.
I will have to learn more about the process and since my dome is shinny, I don't know how
I'll do the weathering to it.
So, Guys I really need help on this one.
Tuesday, May 06, 2008
The Other Leg


I used Glazing Putty to cover any little cracks around the edges of the
Polystyrene on the leg. After this I sanded it down and gave it the 1st coat of primer. This will show me any bad spots I need to fix. Tomorrow, I'll be able to sand the leg and hopefully paint it Satin White.
Rear Skins Painted


I got the rear skin painted today and you can see I painted the inside like I did the front skin.
Now I know the inside doesn't look all that great, But I just wanted to cover all that bare aluminum. The camera makes the skins look shinny, But it's a Satin finish.
Monday, May 05, 2008
Rear Skin Work


I finished my rear Pocket Vent today. I had the paint allready complete, Just had to add the deep channel to the bottom and I bonded 1 of the rear doors. Once I get the other door mounted, I will repaint the rear skin and it will be complete.
Saturday, May 03, 2008
General Video Update
Just showing where I stand at so far. Yeah it's my junk room with all the droid goodies.
Charge Port Video

As you can see in the pic, I need to clean up the wiring. But you can see the Micro switch on the right. This will control the Leds on/off functions. In the video the lights are on when the door is open and they shut off when closed. You can also see that area by the hinges that I need to take care of so the insides don't show.
Charge Port

I installed the Charge Port today and I'm waiting for the bond to dry. Once I can work with it, I will install the micro switch on the rear so when you open the door the lights will flash. Now the Leds in this setup are set for 12v., So when I'm charging my 24v. main batteries it will not interfere with anything. You can see to the left near the hinges I need to do some work and I also want to find some fiber cloth to hide the hinge openings, So when the doors open you can't see inside the droid. The small door that is taped shut is where I will mount my switches to protect my electronics while charging. I have it taped down right now because the magnets on the inside are drying.
Friday, May 02, 2008
Panels Painted


 I got the front skin and the inner door panel painted today.
I also painted the inside of the skin. I couldn't stand the Aluminum showing and this was a big improvement to me.
This will be the last time I paint the skins, It's allot of work tapping all the goodies on the outside.
So if it gets banged and scratched, It will be weathering to me.
More Small Work
I installed another inner skin design, Although this is not where this design was meant to be placed. I wanted something on this door so when it opens and my unnamed gadget comes out it will look good. I also hinged another door. It's the little one by the front vents. I never intended on this one opening, But I need a place to hide some switches. As soon as everything sets up, I'll start painting and installing the charge port.


Thursday, May 01, 2008
Inner Door Skins

I started installing the A&A inner door skins today. I used Amazing Goop to glue the design to my Aluminum door. Once I get everything finished on the front skins, I plan to paint them one more time. This will be a paint job for the outside and inside.
I'm jumping around allot on my current build because I'm still sore. But allot of small things will get done.
Subscribe to:
Posts (Atom)