
We went with the 501st to the Con here in Jacksonville and it was GREAT!!!
There was more people than I expected and a wide verity of events.
I did noticed something about R2,
The floor inside the area had carpet that was slightly padded and
R2 was having some problems moving around.
I have him wired for 12v. which makes him very smooth at takeoff and
gives him enough top end speed.
But on the carpet I had to run him full speed to move around at a good speed.
24v. would have been a better voltage and the carpet would not effect him.
But at 24v. he is very jumpy and too fast.
Not sure how to address this problem and I really don't want 24v.
Anyway, Brenda will post some pics of the event on her blog.
It was fun and next week we will be at the Football Stadium driving our
droids around just for fun.
Sunday, July 19, 2009

Thursday, July 16, 2009
New Banner
If everyone has noticed, Brenda and I have new banners.
Jon was nice enough to make these for us and we both love them.
Thank you so much Jon!!!!!
:o)
Jon was nice enough to make these for us and we both love them.
Thank you so much Jon!!!!!
:o)
Sunday, July 12, 2009
He's up again!!!!
R2 is back on his feet and we took both droids out for a drive. We have a event to go to next Saturday and I was starting to wonder if R2 would be ready, And he's ready.
Friday, July 03, 2009
Repaint
I repainted the rear door due to my bad attempt to weather it.
And I added the power coupler. The coupler will need some touch up
because the tape pulled some of the blue off.
I also added another charge port inside R2.
This port charges the 2 smaller batteries that run the electronics.
I thought about doing away with these 2 batteries, But I have not had any problem
with battery life. So I'm leaving them in there.


And I added the power coupler. The coupler will need some touch up
because the tape pulled some of the blue off.
I also added another charge port inside R2.
This port charges the 2 smaller batteries that run the electronics.
I thought about doing away with these 2 batteries, But I have not had any problem
with battery life. So I'm leaving them in there.


Monday, June 29, 2009
Center Leg Complete
The center leg is back together and for the 1st time,
I have the ankle cylinders mounted.
Now that this is complete, I'll move on to the next upgrade.

I have the ankle cylinders mounted.
Now that this is complete, I'll move on to the next upgrade.

Saturday, June 27, 2009
Small Work
I bolted the dome plate into position and you can see I had to cut the center for the slip ring to fit.
I really didn't want to do this, But it works for me.
The ankle is reprimed and drying.
I did this because I eliminated 2 bolts on each side of the ankle that holds the inner plates for the center leg.
Like I said "Small Work"


I really didn't want to do this, But it works for me.
The ankle is reprimed and drying.
I did this because I eliminated 2 bolts on each side of the ankle that holds the inner plates for the center leg.
Like I said "Small Work"


Sunday, June 21, 2009
More Shoulder Work
The bottom picture shows the 1/2 plate with screws countersunk.
The next picture shows the 1/2 plate with all the holes cut and the
4 holes for the outer plate drilled and tapped.
Also if you can see the 2 screws on each side of the bearing screw on the top plate
which was a added bonus. Once I get my aluminum top ring and bottom ring this
frame will be very solid.
The top picture shows everything bolted and waiting for the legs to bolt.
Both sides are finished now, So I'll move on to the next upgrade.


The next picture shows the 1/2 plate with all the holes cut and the
4 holes for the outer plate drilled and tapped.
Also if you can see the 2 screws on each side of the bearing screw on the top plate
which was a added bonus. Once I get my aluminum top ring and bottom ring this
frame will be very solid.
The top picture shows everything bolted and waiting for the legs to bolt.
Both sides are finished now, So I'll move on to the next upgrade.


Thursday, June 18, 2009
Aluminum Shoulder
The last time I drove R2, I noticed in the shoulder area he would
sway back/fourth.
I've tried all the A&A frame shoulder parts to stop the sway, But the PVC
gives too much. The A&A frame is cut to house the Satellite motors and I'm sure
this added allot of support, But if your not doing the 2-3-2 motion the PVC
is not enough for a heavy droid.
The bottom picture shows the cavity for the Satellite motor to be installed.
And this is where the trouble starts, If your not using the Satellite motor.
So what I did to solve and add allot of strength to this area was to order a
5-5/8 x 6-3/4 x 1/2 inch plate to fill this area and you can see how it fits
in the next picture. This will be bolted to the PVC inner frame around the Satellite
hole and it will be drilled for the leg bolts to connect the leg.
The next picture shows the aluminum shim I made awhile back and it will be
bolted to the thick aluminum.
You need this shim to get the legs to set at the right amount from the body.
Once I get everything together I will make another post.
In all and all, The A&A frame is a good frame for a light weight droid.
If your going to be adding allot of aluminum goodies you will have to
beef it up in certain areas.


sway back/fourth.
I've tried all the A&A frame shoulder parts to stop the sway, But the PVC
gives too much. The A&A frame is cut to house the Satellite motors and I'm sure
this added allot of support, But if your not doing the 2-3-2 motion the PVC
is not enough for a heavy droid.
The bottom picture shows the cavity for the Satellite motor to be installed.
And this is where the trouble starts, If your not using the Satellite motor.
So what I did to solve and add allot of strength to this area was to order a
5-5/8 x 6-3/4 x 1/2 inch plate to fill this area and you can see how it fits
in the next picture. This will be bolted to the PVC inner frame around the Satellite
hole and it will be drilled for the leg bolts to connect the leg.
The next picture shows the aluminum shim I made awhile back and it will be
bolted to the thick aluminum.
You need this shim to get the legs to set at the right amount from the body.
Once I get everything together I will make another post.
In all and all, The A&A frame is a good frame for a light weight droid.
If your going to be adding allot of aluminum goodies you will have to
beef it up in certain areas.


Tuesday, June 16, 2009
Center Foot Painted
The center foot is painted now and once it dries I can add the aluminum strips
to the front and back.
I couldn't get a real good picture because it's still wet, But you get the
main idea how the skirt looks.
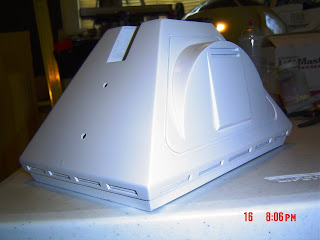
to the front and back.
I couldn't get a real good picture because it's still wet, But you get the
main idea how the skirt looks.

Sunday, June 14, 2009
One step Forward - 2 Steps Back
This is another area that I found needs to be beefed up.
The aluminum plate I mounted had PVC spacers behind it and
I noticed the last time I drove R2, He was swaying in this area.
Not allot, But more than I was happy with.
So I ordered a 1/2 inch aluminum plate to fill up the area behind
my 1st aluminum plate and it will be solid all the way through to the
main frame.

Here's the Jag version of the dome plate.
And you can see it's only 1/8 inch from touching my dome motor.
This caused some new problems, I originally had some of my electronics
mounted on top of the A&A frame and the dome plate ended that idea.

Now everything is mounted to the inner back mount.
This caused allot of rewiring and I had to move a few items around.
Not bad, But it was just extra work I didn't count on.

The aluminum plate I mounted had PVC spacers behind it and
I noticed the last time I drove R2, He was swaying in this area.
Not allot, But more than I was happy with.
So I ordered a 1/2 inch aluminum plate to fill up the area behind
my 1st aluminum plate and it will be solid all the way through to the
main frame.

Here's the Jag version of the dome plate.
And you can see it's only 1/8 inch from touching my dome motor.
This caused some new problems, I originally had some of my electronics
mounted on top of the A&A frame and the dome plate ended that idea.

Now everything is mounted to the inner back mount.
This caused allot of rewiring and I had to move a few items around.
Not bad, But it was just extra work I didn't count on.

Saturday, June 13, 2009
Center Foot Primed
I got the Center foot primed and ready for sanding and paint.
You can see the skirt below the foot and really gives it a nice look.

You can see the skirt below the foot and really gives it a nice look.

Tuesday, June 09, 2009
Little Amp
The Ebay Amp arrived today and I connected it to a Mp3 player
and it works GREAT!!!!
It's very clear and has more output power than I need.
The next thing to do is get it mounted into R2 and connect it to
the M&A sound machine.
I'm really happy with this Amp and highly recommend it.

and it works GREAT!!!!
It's very clear and has more output power than I need.
The next thing to do is get it mounted into R2 and connect it to
the M&A sound machine.
I'm really happy with this Amp and highly recommend it.

Monday, June 08, 2009
Center Foot Skirt
I got a local welder to weld the skirt on for me today.
It's rough, But with some J.B. Weld I can work out the rough areas.
Once I get this upgrade finished, I'll be on to the next outer leg
and then the center ankle.

It's rough, But with some J.B. Weld I can work out the rough areas.
Once I get this upgrade finished, I'll be on to the next outer leg
and then the center ankle.

Sunday, June 07, 2009
Leg Work
If you remember I had 4 holes in the back of the outer legs that held the Boosters
in place.
These holes had caps that covered the bolts through the legs and into the Booster.
Well, They are gone now.
I puttied the holes and did away with the caps.
I'm not 100% satisfied with the work I did on the holes, But unless you hit the
light just right you can't see the spots at all.
I figured that if I needed to remove the Boosters for some reason, I could just dig
out the bolts and refix this area.
I don't ever plan to remove the Boosters unless the leg broke or something like
that happened.
All the bumps and damage that R2 will get will just be weathering :o)


in place.
These holes had caps that covered the bolts through the legs and into the Booster.
Well, They are gone now.
I puttied the holes and did away with the caps.
I'm not 100% satisfied with the work I did on the holes, But unless you hit the
light just right you can't see the spots at all.
I figured that if I needed to remove the Boosters for some reason, I could just dig
out the bolts and refix this area.
I don't ever plan to remove the Boosters unless the leg broke or something like
that happened.
All the bumps and damage that R2 will get will just be weathering :o)


Vex Periscope Lifter
Here's some pictures and a couple of video of the Periscope lifter.
It works and I have plenty of adjustment points to set the Periscope
inside the dome.
The only thing is that Vex servo is loud.
It's not as loud as in the video, But it's still loud.
I'll have to see if I can find a replacement servo and not use the Vex
servo.
Anyway, It's still in the works and you can see the Jag dome plate arrived.


It works and I have plenty of adjustment points to set the Periscope
inside the dome.
The only thing is that Vex servo is loud.
It's not as loud as in the video, But it's still loud.
I'll have to see if I can find a replacement servo and not use the Vex
servo.
Anyway, It's still in the works and you can see the Jag dome plate arrived.


Saturday, June 06, 2009
Email Addy's
Hey Guys,
If everyone would email me thier address, I need them again.
My old comp finaly gave up and the board I bought for R2 is now my
new desktop.
I saved allot of info from the old comp, But I lost everyone's email.
If you would, send it to me again.
Thanks
Calvin
If everyone would email me thier address, I need them again.
My old comp finaly gave up and the board I bought for R2 is now my
new desktop.
I saved allot of info from the old comp, But I lost everyone's email.
If you would, send it to me again.
Thanks
Calvin
Sunday, May 31, 2009
Leg Update
I worked on the leg today and I managed to get the
Ankle repainted, Changed the Ankle detail parts bolts to Alen head bolts.
The bolts you get with the parts you order are Phillips head and they are very hard
to get tight. So it's a good idea to change these before you put them together.
The Booster line on the leg turned out Ok and I also repainted the leg.
The leg had a few spots that the styrene joints showed, So I fixed it before I repainted.
Still more to do to this leg, But that's the next post.


Ankle repainted, Changed the Ankle detail parts bolts to Alen head bolts.
The bolts you get with the parts you order are Phillips head and they are very hard
to get tight. So it's a good idea to change these before you put them together.
The Booster line on the leg turned out Ok and I also repainted the leg.
The leg had a few spots that the styrene joints showed, So I fixed it before I repainted.
Still more to do to this leg, But that's the next post.


Thursday, May 28, 2009
Parts Ordered
I have the Jag version of the dome plate on order and I found
this little Amplifier on Ebay.
The Amp will give me more than enough power (10 watts per channel)
to run the M&A sound system.
The best part is the Amp has a pin port and all I will have to do is connect
the pin from the M&A to the Amp and connect 12v.
Connect the speakers and I should have sound.


this little Amplifier on Ebay.
The Amp will give me more than enough power (10 watts per channel)
to run the M&A sound system.
The best part is the Amp has a pin port and all I will have to do is connect
the pin from the M&A to the Amp and connect 12v.
Connect the speakers and I should have sound.


Monday, May 25, 2009
More Line Work
I used a small file that fits in the Booster Line on the Booster.
I cut the leg until it matched the line from the Booster.
I now the pic makes it look rough and it is still alittle rough,
But the major cutting is done now and all I need to do is alittle
sanding and get it ready for paint.

I cut the leg until it matched the line from the Booster.
I now the pic makes it look rough and it is still alittle rough,
But the major cutting is done now and all I need to do is alittle
sanding and get it ready for paint.

Sunday, May 24, 2009
Booster Line
I rough cut the Booster Line into one leg today.
I'll have to clean it up and repaint the leg after I do both legs.
The reason I didn't do this when I 1st built the legs was I wanted
to wait until I knew for sure the Styrene was glued real good to the
wood legs.
This is one of the upgrades I was talking about in the last post.


I'll have to clean it up and repaint the leg after I do both legs.
The reason I didn't do this when I 1st built the legs was I wanted
to wait until I knew for sure the Styrene was glued real good to the
wood legs.
This is one of the upgrades I was talking about in the last post.


Subscribe to:
Posts (Atom)

