Saturday, December 30, 2006

Glorious Hinges


I tell you, Don't use those hinges from McMaster.
There's too much slop in them and they might be cheaper,
But it's not worth it.
I got 2 hinges from www.robart.com and they're perfect.
They cost alittle more, But if you want your panels to stay in place use them.
I placed 2 side by side, The idea I got from Keith and Carolyn.
My panel opens/closes and hooking a servo to it will be alot easier.
I've got some J.B.Weld to clean up, But I had to show these hinges.

Tuesday, December 19, 2006

Infared Video

http://s71.photobucket.com/albums/i124/ctx3201/?action=view&current=MOV01502.flv
I wanted to show how the infareds see the mirror mounted on the dome ring .
I know the video is not that great and my hands shake, But you can get the general idea.
When the Vex is first turned on the motor finds the front position.
As the Ultra is blocked, The motor will turn to that side. If the signal is lost it returns to the front position. If the signal is constant, The motor will pause for 2 seconds then return to the front position.

Monday, December 18, 2006

More Changes


The bumper switches added a drag to the dome when the switch was pressed.
So I changed them to the Infared sensors I had from Vex.
As the dome turns the Infa's light is refected by the mirrors and acts like a on/off switch.
This gives me a No Contact switch and no drag on the motor.
It's still a mess, But I will clean it up after I get some more progress.
Once I replace the rod I bent for the Utility arm movement, I'll add more pics
and video. The rod was bent because I had it on a Remote switch instead of a
Remote joystick. When that thing was activated it flew out full power and bent the rod.
Which I'm glad this happened now, If a kid was infront of R2 and it opened.
The kid would probly need a doctor. LESSON LEARNED!!!

Wednesday, December 13, 2006

Video

http://s71.photobucket.com/albums/i124/ctx3201/?action=view&current=MOV01498.flv
This's a link to view a Video of R2 turning the dome by Remote and by Ultrasonics.
When you see my hand to the left of the screen, R2 is turning the dome not the Remote.
I need to get a quite servo for the dome, But this is what I have so far.
OOOPPSS!!!

Want to see a Mess!!


Heres some of the progress I've made on R2's Vex system.
Once I get the Legs attached and know for sure the length of the wire,
I'll clean it up then.

Sunday, December 03, 2006

Vex Mounting


I started putting some of the Vex to the test and it works Great!!
I have some bugs to work out, Like the drive wheel is slipping just alittle and I did'nt buy enough cables to move the Vex to the back of the frame.
That little brown area in the front is made of wood and I'll have to change it to a plastic.
It kinda graps the switches as it hits them, I think it's because the wood is rough.
Once I get enough cables any work out the bugs, I'll post some more pics and I going to find out how to post some video.

Wednesday, November 29, 2006

More Vex

Ok, The coding for the Vex used in the body is finished. With the help of Marko, We were able to get what I was after in the code and it works better than I expected.
Now I need to get the Vex mounted in R2 and I need to order some longer wires for the Ultrasonics going in the legs. I think I'm going to try that Youth Tube to post some Video of R2 moving his dome.
Now that this is finished, I'm going to start on the Dome Vex. This will control movement in the dome.

Thursday, November 23, 2006

Vex Setup

I don't have any pics to post right now, But maybe by the weekend I'll have some to post.
I've been working on coding the Vex for the body and have some of the electronics mounted in R2. This has been a time consuming task and the code keeps changing as I move froward.
R2 at this time can tell if someone walks up on either side and turns the dome to that side as to look at whatever is there, Then the dome returns forward and waits for the next victom.
Thats about it for now.

Monday, October 30, 2006

Periscope Lift


I know this thing looks huge, But it not and it will get reduced where the bulk is not needed.
I plan to have this activate by a Light Sensor in the dome.
It will raise the Periscope then pan left/right then lower the Periscope.
I'm getting alot of help from a fellow Vex user and it's very nice of him to do this for me.
Well, Here's the Pics!

Wednesday, October 25, 2006

Octagon Port


I installed the 1st Octo. today and will J.B. Weld the countersunk screws when I get the door hinges mounted.
Once I do this, You'll never know there was screws showing on the outside.

A&A & Utility Arms


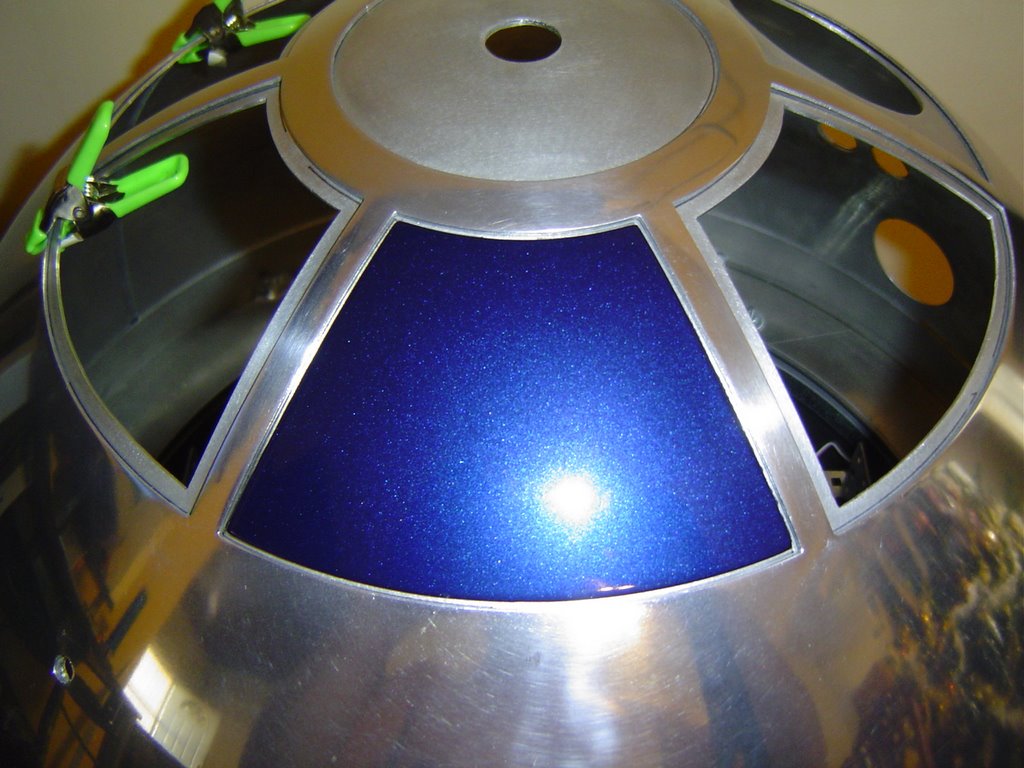
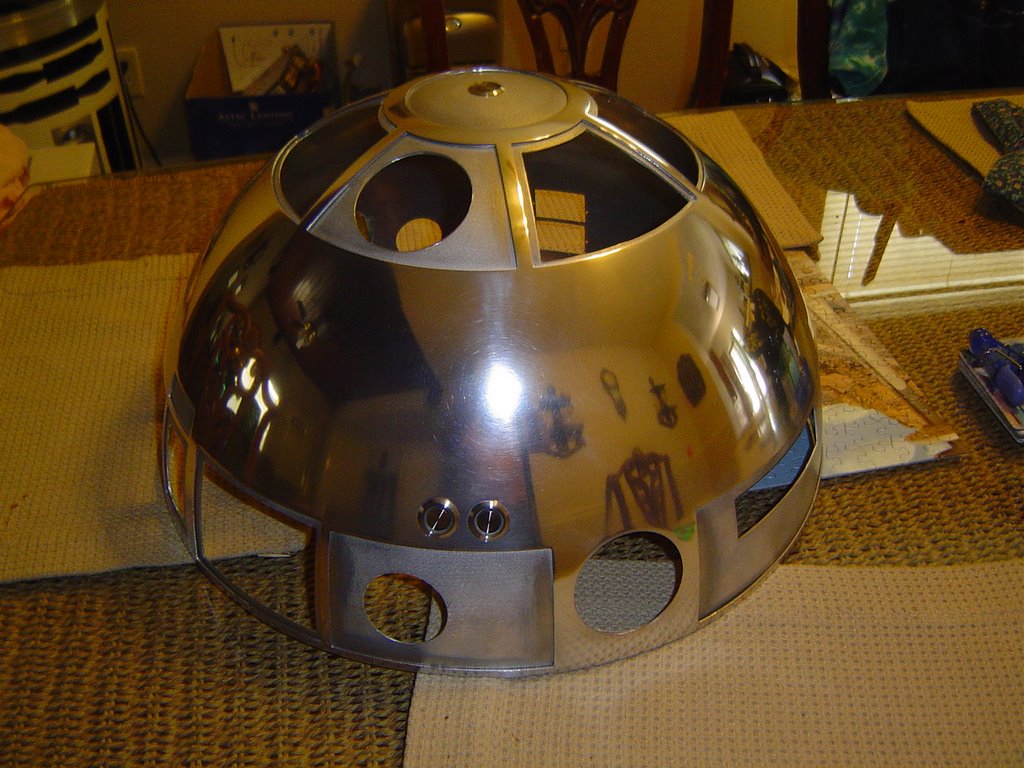
As I said, Things will change here alot. I'm learning as I go and will make many mistakes.
But I try to improve on everything I work on.
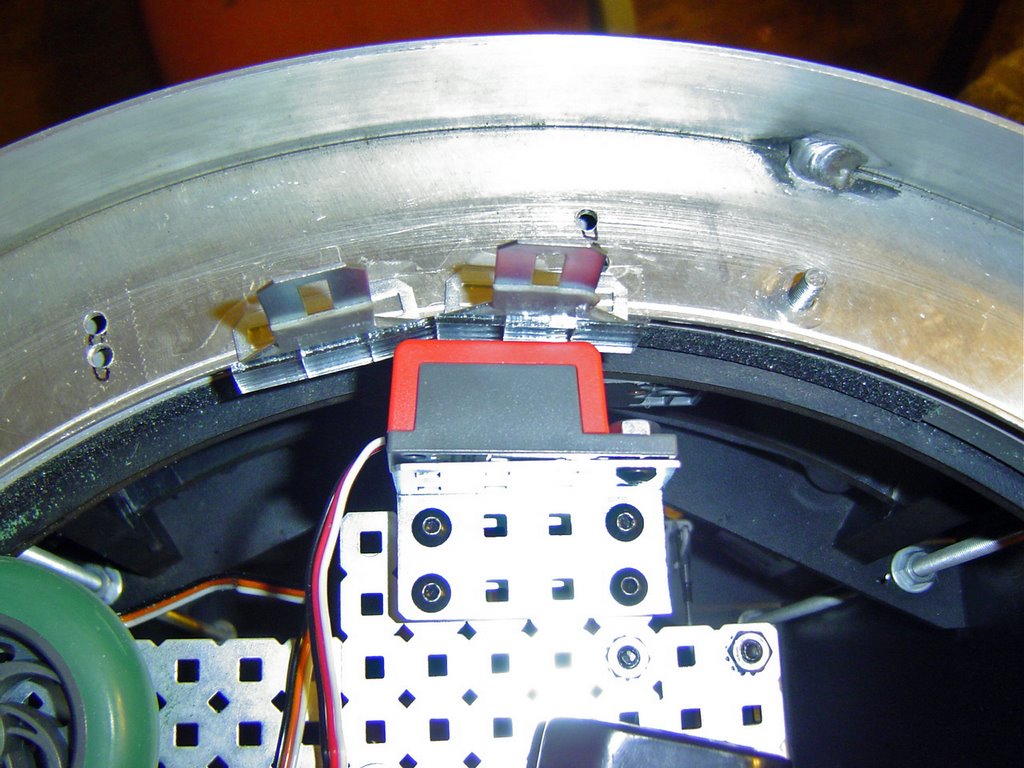
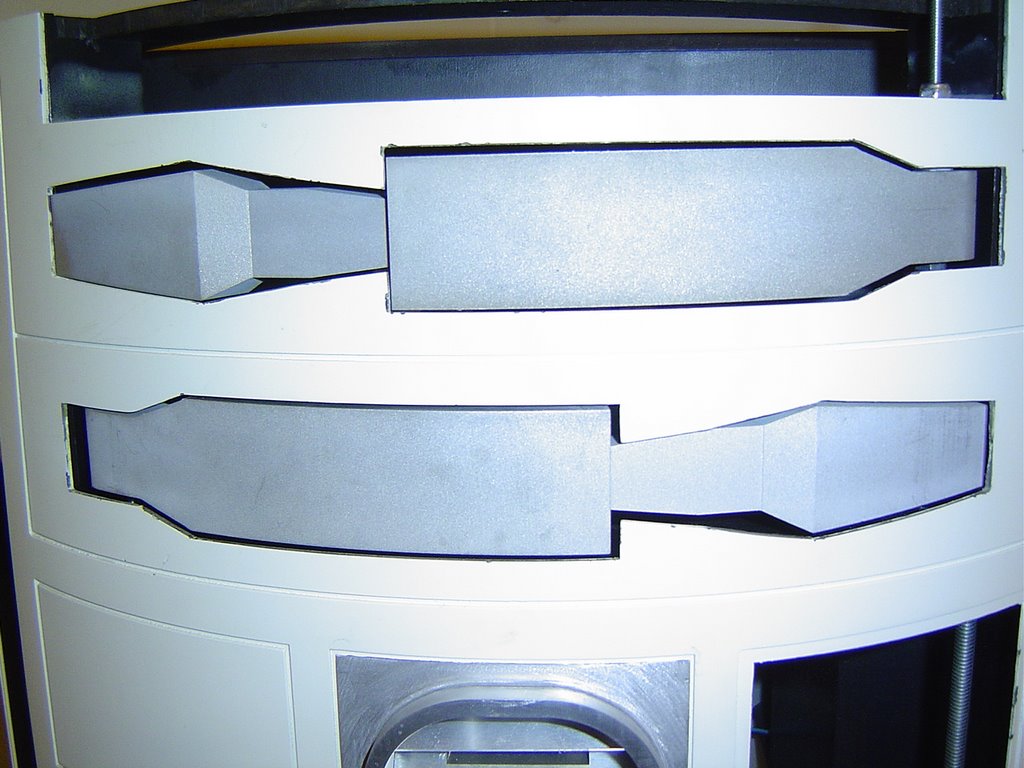
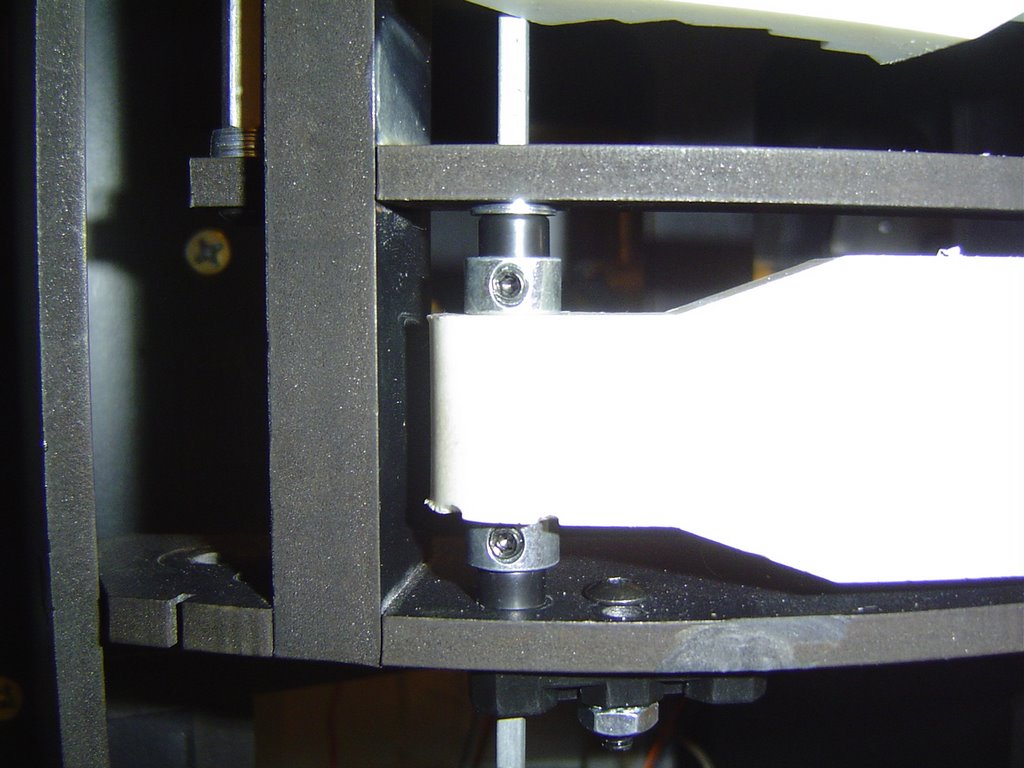
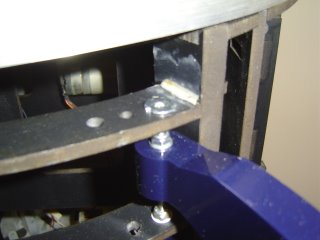
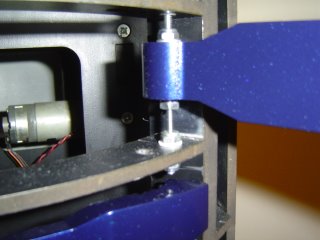
The Arm mounting point, I found alittle area for improvement.

This pic shows the end of the arm carriage and I used a shim to lock the carriage. I don't know if this is what Andy intended this for, But it sure adds strength to the carriage.

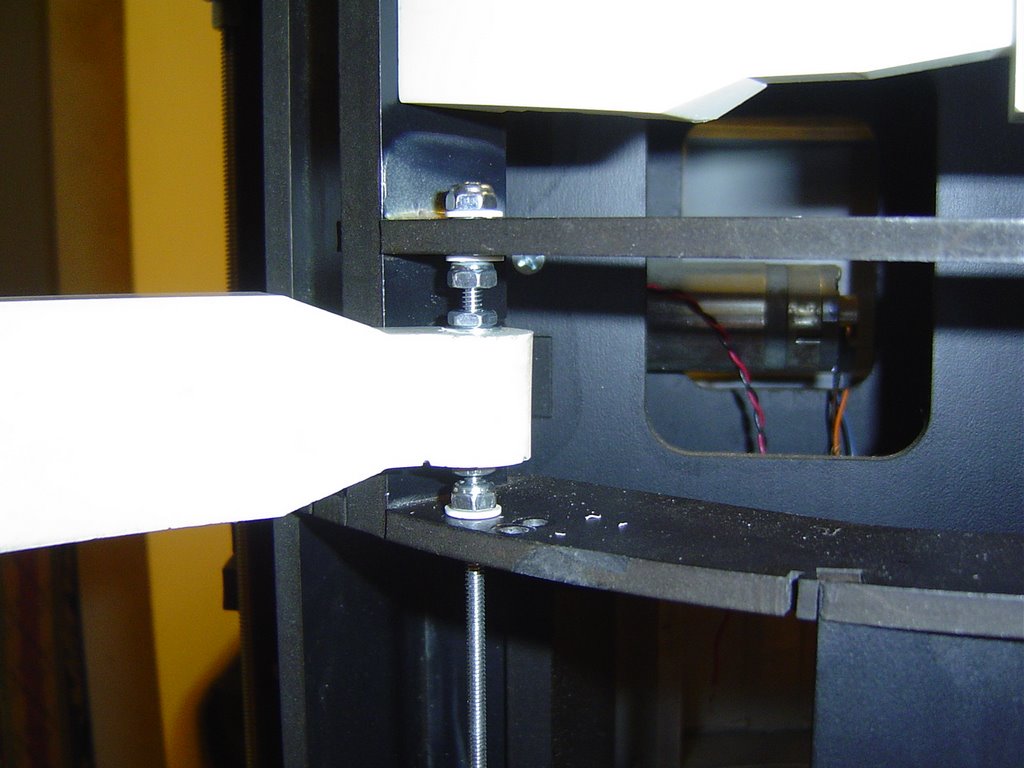
The next pic shows the threaded shaft I used to pivot the Arms.
The Aluminum Arms come predrilled, But the hole was to big for me.
So I used a Nylon sleeve inside the Arm and reduced the size of the hole to fit the threaded rod.
I used 2 teflon washers on top/bottom of the Arm, The I bolted them with 2 lock nuts.
This gives me an adjustment point for the Arms to be set to the skin.

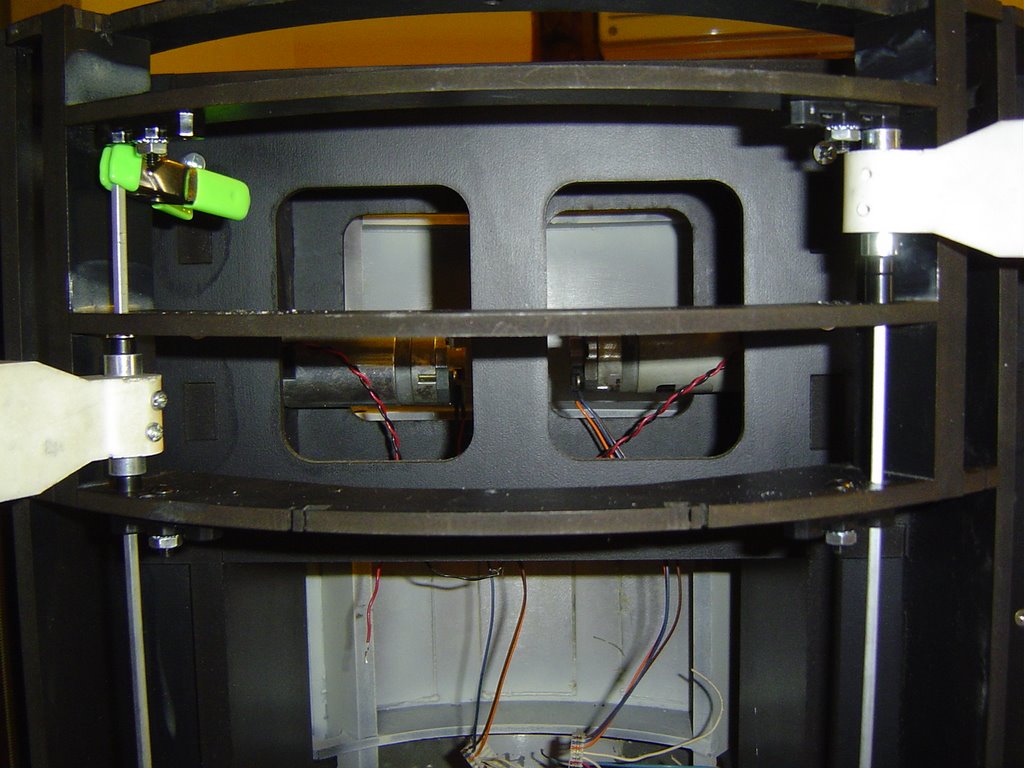
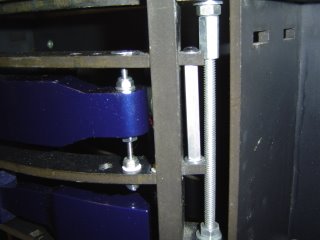
The next pic shows the T-nut I used to align the threaded rod to the carriage.
Now the T-nut does'nt lock the Arm so it won't move and thats what I intended it to do.
I greased the T-nut and threaded the rod into it and at the bottom of the carriage I used teflon washers and lock nuts. Between the lock nuts, Theres another nylon sleeve inside the frame.
This allows the threaded rod to pivot.
This is what the whole system looks like.
The system allows the threaded rod with the Arms locked to the rod to pivot the whole system together. I've took my skins off the frame several times and pivoted the Arms over/over and the position has stayed true everytime. So I'm convinced the system will hold up to wear and tear.
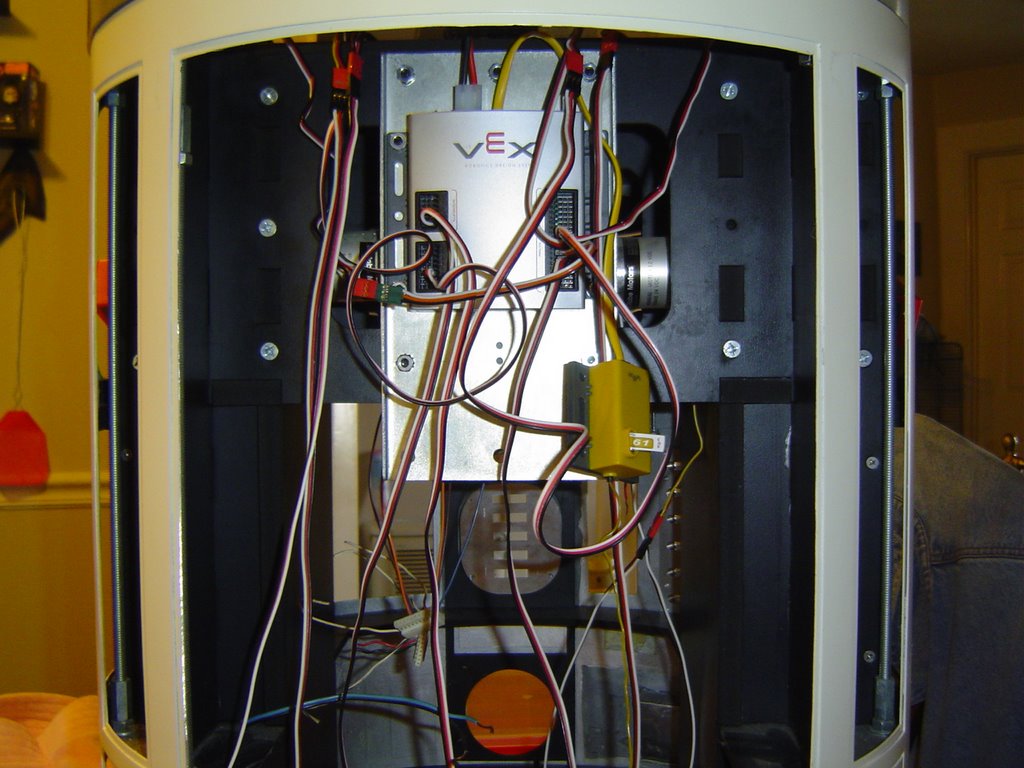
I'm currently working on the Vex system to move the Arms and other items.

Thursday, October 19, 2006

Pics Finally


Ok, I could'nt wait till the weekend to post some new work on R2.
So here's the Utility Arms, I got them painted and installed.

Wednesday, October 18, 2006

Utility Arms

Well since my Comp. died, I'm on my wifes laptop and will only post pics on the weekends.
But today I got my Utility Arms painted and installed into the A&A frame.
I have the Aluminum arms and I ran into a problem when installing them.
The arms are to spec., But the Aluminum skins I have are not allowing the arms to open.
So what I did was to enlarge a certain area of the skin as the R2 Builders requested.
Also after doing this, I had to cut the arms in the area where the back of the hand area comes
into contact with the skin.
From the outside you can't see where I cut the arm and when the arm is open,
It looks like R2 has thumbs.
I'll post pics this weekend and you'll see where the cut was done.

Wednesday, October 11, 2006

Dome Panels Again


I got the panels painted again, And right now they're alittle dusty.
I'm afraid to wipe them done right now.
But here's what they look like and 1 day I'll get them mounted.
I've also got to get my center button painted

Saturday, October 07, 2006

Radar Eye/Data Port Mounting


Ok, I studied some pics from Astromech and found many different positions for the Eye.
I'm not sure which is correct. 1 is high - 1 is low - 1 is crooked etc.
So I mounted the eye kinda neutral.
The Data Port fit perfect in the A&A Frame.
Anyway, Please leave a comment about the Eye position, Good/Bad?

Thursday, October 05, 2006

Slow Progress


I got some painting done today, But I have a couple of bad spots to touchup.
The pic does'nt show the paint very well, But its slick and shiney.
Also the Power Coupler, I just set it in the spot and I'll have to get it mounted soon.
Hopefully I'll get the arms painted and finished soon.
The white will get its final paint and from there on, I'll have to be careful not to mess it up
this time.

Monday, October 02, 2006

Power Coupler Painting


I got them painted and I need to do some touchup.
The Liquid Mask does a pretty good job, But it did try to
lift some of the paint.
Using an Xacto knife, I was able to get the mask out without to
much damage.
Here's 2 pics of how it turned out.

Sunday, October 01, 2006

Front Logics


This is not what I wanted to do, But it will have to do for now.
I wanted to get my local shop to machine the surrounds and they're booked
till the first of the year.
So, What I did was to use a plastic flat and mount the logics to the flat.
This allows the Aluminum surrounds to mount normal in the dome
and keeps the logics flat across the angled surrounds.
I made it wider than the logics and will drill an oversize hole on each side to
mount it to the dome. The large hole will allow me to adjust the logics, So
they look correct from the outside.

Masking for Paint


Ok, I got this idea from Victor about liqiud masking.
I could'nt find the Latex stuff he used, But I found this stuff.
I'll know tommorrow if it works as good as Victors.
If you can see it in the pic, It's that goo down in the Power Ports.

Monday, September 25, 2006

Oh YEAH, PAINTING


Now that I'm not having the Krider Blue problem anymore, I'm painting away HAHAHAHA!!!
Man, And it even rain today (Humidity) HA, Didn't even slow me down one bit.
You don't know what a feeling it is to get this painting problem solved.

Sunday, September 24, 2006

New Paint Method


I tried several times to get the Krider blue to work for me and everytime something went wrong.
So I came up with my own paint method and it's very close to the Krider color.
At anyrate, Be the judge for yourself.
Krider's is the Pie Panel and mine is the Octagon.
With/Without flash pics.

Friday, September 22, 2006

New Aluminum Arms


Oh YEAH, Oh YEAH!!
I got those Aluminum arms installed!!!
They're not fine tuned yet, But I could'nt wait.
Someone had posted on R2 Builders that the Aluminum Arms were to heavy for
the A&A frame, But thats not completely true.
You just have to mount them with shims and beef up the carriage alittle.

Trial Fitting the rear Logics


I cut the area around the Logics, So I can adjust the position when its time for the final fit.

Wednesday, September 20, 2006

Rear Logics


Here's the pic of what I got finished.
The surrounds need some buffing and I still need the Pic Flasher. Sorry the pics are alittle bright, But i wanted the detail to show.
After I got all the LEDS in the board, I had to find 2 that went bad during the soldering and replace them. The bad part was all I had to find them with was a 3 volt battery and a print of the pattern they were in.
Anyway all 108 leds work now.

Monday, September 18, 2006

Updates

I've got alot of things ready for post, But I've been so busy and alittle sick That I'll have to post pics later.
Anyway, I got the LEDS soldered into the board I bought from Leon, Just got to get the resistors soldered.
I had to file the Aluminum surround for the Leds, Because there was a difference between
Leon's board and Wayne's surrounds. It took 3 hours to get them to match up.
Hopefully this weekend I'll have this mounted and tested.
Got the last louver mounted into the front vents and the small speakers mounted behind the
vents.
I also got the inner dome remarked, I did this so I could order the hinges and start predrilling
the countersink holes to attach the hinges and other items.
Well, I'll get the pics up soon.

Sunday, September 10, 2006

Utility Arms Redone


OK, I know!!
I change things all the time, But I was not happy with the way my arms were mounted.
Sometimes you have to step back and say: Why did I do that?
I turned something simple into a mess.
Anyway, This is how they will be from now on.
I used:
6-32 x 6" Threaded rod, 6-32 Lock nuts
1/4 x .140 x 1 Nylon Spacers
Teflon washers that came with the Vex kit.
I cut the Spacers a little thicker than the A&A frame and drilled the preset holes to 1/4,
So the spacers would fit and also give some extra length so the lock nuts would tighten against
the spacers and slightly against the frame. Once set into the frame they provided a bearing for the threaded rods to slide.
The teflon washers, Also provided a slick surface for the lock nuts to slide.
More/Less I made my own bearings.
In the pics you can see how I made this work, The only problem now is to cut the rods to the
correct length and to find a belt drive gear to work each arm.
By the way, I've got the Aluminum arms on order and when they come in, I'll redo again!!

Tuesday, September 05, 2006

Utility Arms


Oh Boy, These things are driving me CRAZY!!!
When I first got my arms I drilled the hole the size that kinda looked like it was meant to be.
Big mistake!!!
So now I have to fill that hole solid and work it again.
Ok, What I used for bearings and spacers were the parts that come in the Vex kit from Radio Shack. As you can see the rod comes down into the belly area, Thats where I'll attach my gear to drive the arms open/close.
Here again is where I have to make a sacrifice!!
The rods will be in the area where the arms close at, So I'll cut a slot in both arms and they will close all the way and have a stop to close too. Hopefully I can paint the rods flat black and they won't show that much.
I still don't have these set correctly, But I will, I hope.
Anyway back to work I go!!!

Sunday, September 03, 2006

Recent Dome Pics


Here's where I stand as far as getting the dome together.
All panels are cut and ready to silicone the domes together.
My nerves will be shot by time I get the 2 domes meshed, But it's
progress.
I've take alot of advice from Victor, He's been alot of help on this project!!!
So, after I clean the inner/outter areas, I'll have 1 dome instead of 2 domes.
I noticed the pics make some areas look jagged, But they're not.

Monday, August 28, 2006

Front Logics


I started working on the surrounds today.
They're just set in place for now with toothpicks, So they're not exactly straight and I don't have the panel around it.
I've got to find some small screws and if a tap this small is available.
I'll true everything up when I find the screws.

Sunday, August 27, 2006

Group Pics and some other Pics


There was a nice bunch of people at the meeting.
That's me with the Tydie shirt and the big belly on the right.

More Pics


They had a special guest, R2 from Disney!!!!
It really was a nice meeting!!!!