

As I said, Things will change here alot. I'm learning as I go and will make many mistakes.
But I try to improve on everything I work on.
The Arm mounting point, I found alittle area for improvement.
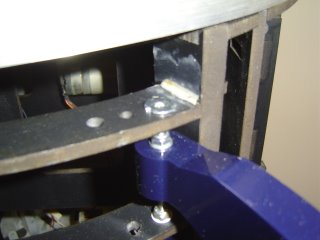
This pic shows the end of the arm carriage and I used a shim to lock the carriage. I don't know if this is what Andy intended this for, But it sure adds strength to the carriage.
The next pic shows the threaded shaft I used to pivot the Arms.
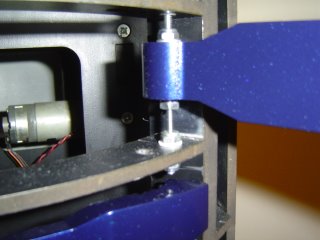
The Aluminum Arms come predrilled, But the hole was to big for me.
So I used a Nylon sleeve inside the Arm and reduced the size of the hole to fit the threaded rod.
I used 2 teflon washers on top/bottom of the Arm, The I bolted them with 2 lock nuts.
This gives me an adjustment point for the Arms to be set to the skin.
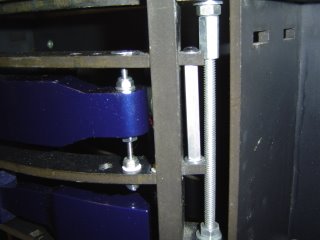
The next pic shows the T-nut I used to align the threaded rod to the carriage.
Now the T-nut does'nt lock the Arm so it won't move and thats what I intended it to do.
I greased the T-nut and threaded the rod into it and at the bottom of the carriage I used teflon washers and lock nuts. Between the lock nuts, Theres another nylon sleeve inside the frame.
This allows the threaded rod to pivot.
This is what the whole system looks like.
The system allows the threaded rod with the Arms locked to the rod to pivot the whole system together. I've took my skins off the frame several times and pivoted the Arms over/over and the position has stayed true everytime. So I'm convinced the system will hold up to wear and tear.
I'm currently working on the Vex system to move the Arms and other items.


No comments:
Post a Comment