Wednesday, May 30, 2007

Slow Pace

Man, I got to get myself in gear!!!!!!
All I did today was work on 1 leg in the Undershoulder detail area.
It looks alot better now, I got all 3 layers of wood in this area to match.
I did discover one thing though. I thought my idea for bolting the legs on kinda stunk,
But I looked at a pair of A&A legs and they bolt up just like mine do, So I guess it's not to bad.
I did cut alittle deeper in the bolt area, But it's still not enough for the hub to set down.
So I'll get the vise for my Mill and mill the hub to fit.

Tuesday, May 29, 2007

R2 Progress


Not really much, But got the dome back on R2 and man is this thing getting bigger.

I've seen R2 so much, That I did'nt realize how big he really is getting.

Anyway, I'll rip the legs off soon and finish them with the bondo and paint.

Cross your fingers!!!!

Monday, May 28, 2007

Legs Attached


Ok, I ran into a couple of problems with the legs.
The bottom pic shows how I shimmed the A&A leg mounts.
1st - I drilled and tapped the holes in the Sat. motors to use 1/4 rod. The rod also has a nut to tighten the shaft down to the Sat. holes, So no slipping in this area. This was followed by a washer to fill the area between the nut and the A&A - Jag style stops. No play in this area.
I also added white nylon bushings into the holes, So there was no play in this area.
In the next pic, You can see the rods and the legs bolted to the frame.
Now this was my 1st problem area. The nuts barely have enough room to fit down into the leg and I didn't expect this when I was building the legs, But they do the job.
The 2nd problem was in the hubs.
The 3rd pic shows the back of the hub and there is allot of excess Aluminum in the inside of the hub. This area hits the nuts inside the legs and won't allow the hub to slide all the way into the leg. So what I will have to do is mill the area down to a smaller size and then the hub will slide all the way into the leg. I'll post pics after I mill the hubs.
The top pic shows the legs bolted on R2 and I sat the front skin on for looks.
Anyway, If your building your own legs. I suggest you find away around this problem.
It's not a bad solution to building legs, But it causes extra work and may be too much for some people to deal with. Also if your buying the Jag style legs, You may run into a similar problem with bolting the legs to the Sat. motors.

Thursday, May 24, 2007

Dome Controller


The SyRen 10 motor controller came in today and I tested it out on the motor for the dome and it works great!!!

I almost wired the thing wrong from the Vex to the SyRen. The wires from the Vex only uses 2 of the 3 wires going to the SyRen.

The black which is the ground and the white which is the signal. I didn't know it does NOT use the red wire coming from the Vex, But everything is OK. I set the pins and in about 2 minutes I had the motor under control by the Vex Micro. I'll get it mounted into the panel and get the motor in place and give it a try at turning the dome. I will have to recode the Vex software to match the new motor drive.

Sunday, May 20, 2007

R2 Leg Work


R2 now has 2 legs, They're not complete yet but they will be soon.


As you can see in the pic, I put the horseshoes on for looks right now and I need to drill the booster bolt screws into 1 leg.
I also drilled the bolts for the shoulder and this will make the area stronger.
The shoulder detail area I still have alot of work to finish. I have enough wood left over that I will start cutting another set for my wife's allwood yellow R2.

Thursday, May 17, 2007

Not Much Today

Not much to add today. I did get the other outer leg together and now I will start squaring and truing the 2 legs. After I get them lined up correctly, I will start with the bondo to work out the low spots and then they'll get the 1st coat of primer.
So it should be soon now that the leg build will be over.

Saturday, May 12, 2007

Electronics Panel


The top pic shows the rear of the removable panel. I added 1 Aluminum angle to each side and these will have slip holes in them so I can remove the panel fairly easy from the A&A frame. The next pic shows the Vex and the terminals that will supply power for my needs.
The terminal on the left will supply 24v.
The terminal on the right will supply 12v.
The terminal on the bottom the Ground. There will be 2 more small terminals that will be regulated. 1 for the Vex and 1 for the Servos.
The last pic shows the panel back in the frame and the little yellow box is my remote receiver.


Friday, May 11, 2007

More R2 Work


The top pic showes the 4 outer holes I drilled into the shoulder. This will provide more strength to this area, Since I have wood legs.
The bolts will go through 2 layers of the legs and bolt the shoulder to the legs, I need to get a mounting kit for my Mill so I can countersink the actual nuts down inside the shoulder. I tried to hold the piece by hand and there was no way I could hold it.
I also worked on the mounting area for my electronics. The pic does not show the Plexiglas to good, But on each side of the marked area is shiny black plexi. And the area that is marked is also the Plexi, But I won't remove the paper until I'm done fitting the electronics. All wiring will be fitted through the Plexi with grommets and attached to the back.


Tuesday, May 08, 2007

Wiring Diagram


I got this idea from one of the other builders and I'm sorry I forgot which builder it was,
But it was a great idea.
I'm not anywhere near this part of the build, But i thought I would work it as I go along.
The color chart shows the definition of what each color and letters stand for on the second chart.
And JASON, You put the bug in my ear about different motor controllers and look what happened. I won't be using the Victors instead I will be using the Syren controllers.
And I THANK YOU very much to get me curious about what else was available.
These are still overkill, But at least I know they won't burn up on me.

E-11 Work


Did some more work on this project and added alittle more detail.


Around the magazine, I had nothing to simulate a seperation point.


So I scribed a line into it.


I also worked on the end and added 2 washer and screws, But I've got more work to do.

Saturday, May 05, 2007

Here's some short videos

Here's the links:
http://s71.photobucket.com/albums/i124/ctx3201/?action=view&current=MOV02113.flv

http://s71.photobucket.com/albums/i124/ctx3201/?action=view&current=MOV02111.flv

http://s71.photobucket.com/albums/i124/ctx3201/?action=view&current=MOV02110.flv

And More


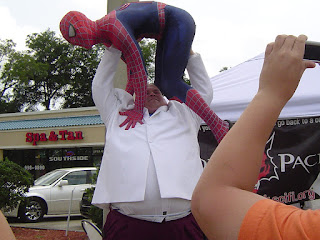
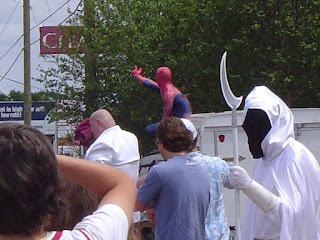
This was an AWESOME day at the Comic book Store.

The 501st Storm Troopers, KingPin, Moon Knight, Joker, Darth Vader, Jawa

Resident Evil, Spiderman and my R2 Dome where all there. I got my R2 door signed by

Hal Wamsley ( He was the Jawa that shot R2 ). Everyone was enjoying the event and

it was funny to have so many different people at the meet.

More Gothem Pics


Gothem City Day


Thursday, May 03, 2007

Dome Motor Revised


Ok, I was unhappy with the noise the Vex motor was making and I did'nt see anyway of making it more quite. So the motor I removed from my Satallite shoulder motor I put to use.
It was a real pain getting the motor out of the housing and then getting the gear head off the motor, But I got it done and now here is where the motor is now.
The top pic shows how I mounted the new setup in the A&A frame and this is where it was before with the Vex motor, So there should be no problems here. The 2nd and 3rd pic shows how it mounted to the mounting plate and the support frame I put around the motor.
I know the frame is alittle out of square, But it does'nt hurt anything and that's how it bolted up at the bottom. I'll use a Syren10 between the Vex Micro and the motor, Since the Vex can't handle this type of motor. It will be so nice to have the dome turn and not make any noise.


Tuesday, May 01, 2007

More E-11 Pics


I started working on the Scope and the Mounting Rod. I compared the pics at:

http://uniquecanes.com/new/item_replicas_starwars_stormtrooperE11.php

And this is kinda close, But I need the cone shaped Eye piece.

I also bought some rough texture paint for the blaster when I get it ready and

I'm going to try to dry brush some areas where it will look weathered and banged around.

So it's still in the rough stage, But I think it might turn out OK.